How to build a simple website Analytics Tools Using Ajax, PHP & MYSQL.
Have you ever encounter a situation whereby, you built up a mini website using html and css and try hosting it using Netlify or Heroku but eager you to know the amount of visitors who visited your site and track their location & ip Address.
Well, that was actually what i taught off, why cant i build mine instead of using the most popular google analytics tools out there, if i can then why do i call myself a developer.
Off course yes, well sit back and enjoy this cause in this article i be going over building this simple tools using:
- Javascript
- Ajax(jquery)
- Php & Mysql
Making this application a fullstack application, well if you're curious in getting started right now, the source code is available right now on my github repo Site Tracker.
kk, now let actually think of how this would be posiible.
now, whenever a user opens or click our link or url, and then the site finally opens up, we can catch that event using a javascript window method called window.addEventListener("DOMContentLoaded", function) . you might be wandring what this does well, The DOMContentLoaded event fires when the initial HTML document has been completely loaded and parsed, without waiting for stylesheets, images, and subframes to finish loading. In a layman standard, this event is used whenever our browser finished loading up.
kk,now since we now know how to catch the user whenever they visit our site, now let talk about tracking how many time the user visited our site. We can do that by writting a simple function in javascript which would be responsible for making a request to our backend which will inturn contact our database and insert a perticular number into our database, so whenever the user tries visiting our site we would increment the number in our database by using an SQL statement which is UPDATE table_name SET column_name='incremented number. the following sql statement would be responsible for updating record in our database, while inserting first data in our database table, we would use the following sql statement INSERT INTO tablename(table_column) VALUES('value you wanna insert') .
KK, now we know that, let talk about fetching data from our data base. Note: both INSERTING & FETCHING DATA would be achived using the jquery ajax method.
You might be wandring, what the hell is ajax and what is it use for. AJAX is a technique for creating fast and dynamic web pages. AJAX allows web pages to be updated asynchronously by exchanging small amounts of data with the server behind the scenes. This means that it is possible to update parts of a web page, without reloading the whole page. the syntax for javascript ajax goes like this.
function loadDoc() {
var xhttp = new XMLHttpRequest();
xhttp.onreadystatechange = function() {
if (this.readyState == 4 && this.status == 200) {
document.getElementById("demo").innerHTML = this.responseText;
}
};
xhttp.open("GET", "ajax_info.txt", true);
xhttp.send();
}
loadDoc()
while, that of Jquery Ajax looks like this.
$.ajax({
url: "fetch.php",
method: "POST",
dataType: "text",
data: {
fetch: true,
},
success: (data, status) => {
counttxt.textContent = data;
},
});
cool right. The above code does the same thing is just the syntax that defer. When fetching datat using ajax to our backend, we would use a javascript timer called setInterval(function(){}, 500). This function is responsible for executing whatever function we declared or instantiated inside it. So the fetch function which we were talking about, would be executed every 500ms (Milliseconds) which would make our application behave like Realtime application.
Now, let begin with the coding aspect. for this application to walk successfully make sure youve included the bootstrap cdn, jquery cdn in order to make use of jquery ajax syntax.
STEP 1) Create DataBase & Tables on your localserver, mine is (XAMPP).
The first thing you need to do right now is to create our database where those data would be stored.
After creating your database it should look like the image below.
DataBase Name ---- Views
Database Table ---- views
After, that run the following code below to insert first data to our view table
--
-- Dumping data for table `views`
--
INSERT INTO `views` (`id`, `count`) VALUES
(1, 1);
After doing that, you should have one record on your database table.
STEP 2) Creating UI using HTML CSS & Bootstrap.
The next thing for you to do is copy the below codes, create a new files called index.php, db.php, insert.php, fetch.php, style.css.
---index.php----
This particular files holds up the ui of the site, and just leaving this poor guy alone isnt great, so that why we added css just to make hime feel comfortable.
--Style.css
Nothing much about this file, it just random css property and value. The only word of advice i can tell you right now, is that just know when to use css property and value and when or where not to use it.
---db.php
This files holds the gateway to our application, without this file or snippet of code our application is useless. for we to be able to communicate with our database we have to ge connected first before writing any other code available. In other to connect to our database using PHP we use a mysqli function called mysqli_connect(1,2,3,4) which takes in 4-parameters namely
- Localhost. (default localhost)
- localserver username, in this case it always root by default
- Cpanel / phpmyadmin password, in my case i didnt set a password for that so i replace it with a value called null which means empty.
- Lastly our database name which in our case it views.
Easy right.
----insert.php----
This code is responsible for updating whatever record we have in our count column inside our views table. We wanna restrict users from enteringt this page that why we use PHP isset() function whichchecks if a perticular variable is set or not, if it returns false we wanna redirect the user back to home page which i didnt set....i,m so dummy.
After that we use the sql statement UPDATE views SET count='$newcount' , in this case our count column values would always be incremented by one whenever a visitor visit our page.
---fetch.php---
This file is responsible for sending whatever count values we have in our database to our frontend application.
---view.js----
This is were the fun begins. First we wrote a function which would be instantiated / created whenever our browser window is loaded by the user, which will the make a request to our backend application.
Now slow down, you might be wandering how do we track users IP address and Location whenever they visit our site, well off course you dont want me to create the whole algorithm for that task right?. So in that case we would be making use of what we developers call API.
What is an API?
API is the acronym for Application Programming Interface, which is a software intermediary that allows two applications to talk to each other. Each time you use an app like Facebook, send an instant message, or check the weather on your phone, you're using an API.
Or in other terms, an API (application programming interface) is an information gateway that allows the back ends of software and services to communicate with one another.
Now you know what an api is, let make use of an api called IP Geolocation Api. This api is responsible for tracking down which visitor visited a particular url or page last.
To make use of an API we have to do that using the HTTPS Method. This methods allows us to Create, Read, Update and Delete data from a server. Popular methods are GET, POST, PUT, PATCH, DELETE.
In this application all we need is the GET method, since we are trying to get a particular information from that api provided above.
To do that, we use the javascript fetch api. What is fetch? The Fetch API is a simple interface for fetching resources. Fetch makes it easier to make web requests and handle responses than with the older XMLHttpRequest, which often requires additional logic (for example, for handling redirects). Note: Fetch supports the Cross Origin Resource Sharing (CORS).
Howerever, it takes in some parameters, but in our case we only need the returned value. so we added the url to the api which will instantly fetch what soever data present in that api. Note: the api which we are working with requires some extra query like the api_key, all you need to do is to signup on that site, and you would be provided with your own personal api key which would enable you access their data.
After fetching the data, it returns the data in an objects format with some unwanted key values pairs, that why i used the javascript object destructuring principle. JavaScript Object Destructuring is the syntax for extracting values from an object property and assigning them to a variable.
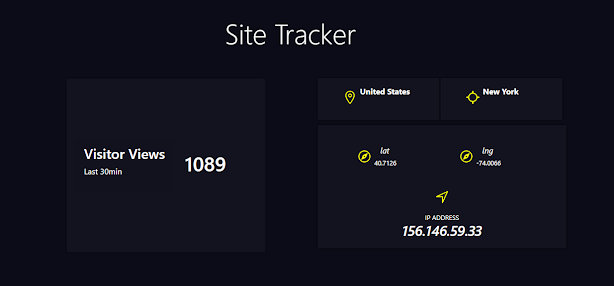
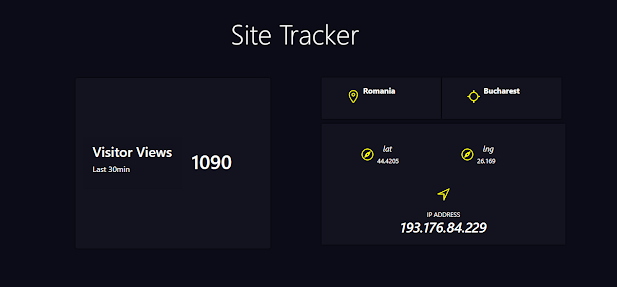
So all we need are the visitors city, country, latitudes, longitudes, and ipaddress.
Finally we outputed the data into the dom using template literals in javascript which allows us to embed html directly in our javascript syntax (` ` ) , we then append it to the parent element which we selected from the DOM using the querySelector() method.
Hope my explanation was clear enough.. If you did the correct thing above and run your file the result should look like the image below.
And that is guys, if you enjoy reading through this article, hope you got what you came for, also consider sharing this to everyone outthere.
Thanks you and happy coding.


1 Comments
Excellent article. The only challenge with storing the metrics data in Relational DB like MySQL is, the DB gets slow over a period of time when the site has a ton of traffic. You need a columnar DB like Redshift. Anyway please checkout trueinsights.co and its a new analytics platform, which simplifies the analytics by providing the insights as narratives/stories.
ReplyDelete